Wednesday, June 29, 2016

Top three qualities of a successful blogger

The qualities of a blogger should be attended at all times in order to become someone popular on the internet. A blogger should have plenty of ideas for creative writing, along with a truckload of motivation. The results sought will not come overnight and there's no guarantee that this will be easy.

These are the two things that you need in order to fulfill your dream of running a successful blog: a lot of exclusive content and readers' loyalty. In each case, time is required to develop the success. This is a process and not a short-term event.
qualities of a blogger

Related: How to Write SEO Optimized Blog Posts

Top Qualities To Become a Successful Blogger

Here are three qualities of a blogger who as a site administrator will need to have, if your goal is to manage a successful blog.

Before/After Photo Effect with jQuery

If you have a design or makeup blog, or if you are using before and after image comparison, this script will surely be very useful for you. In this tutorial, you will see how to add the Before/After plugin, a script that works with jQuery to display two pictures dynamically for comparing them at the same time.

To see it in action, please click on the demo link from below - by dragging sideways the small bar, you'll see both images that are being compared:

Before & After Demo


Implementing this script is really easy. We just need jQuery, the Before/After script, and the two images to compare.

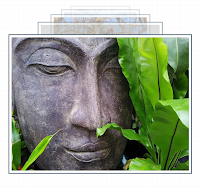
Spacegallery: image gallery/slideshow made with jQuery

There are many types of galleries for images that can be found on the internet, but we rarely find one displaying images so differently like this one. Those using Mac OS X will surely notice a lot of similarity with Time Machine and those who don't, I'm sure will enjoy this type of effect for viewing images.

image gallery with jQuery for blogger
SpaceGallery is a JQuery based slideshow / image gallery that performs overlaying in a visually appealing manner and provides a smooth fade out effect to images. This 3D image gallery lets you float through your pictures easily by enlarging them with an Apple-like animation.

To see the SpaceGallery slideshow in action, please visit this demo blog and click on the first image:

Add Keyboard Keys Effect To Your Text in Blogger with CSS

For many of us the design and the template are the most important, making our readers be more interested and coming back to our blog. There's an HTML element meant for marking up keyboard keys named <kbd> which can be styled with CSS, so why not use it to make those elements look the keyboard keys?

Thus, in this tutorial, I am going to show you how to create a keyboard keys effect with CSS. It doesn't require images so your blog will load faster.

how to add keyboard keys with css in blogger

How to Add Keyboard Keys to Blogger


Tuesday, June 28, 2016

Mengganti background dan warna pada Start Screen di Windows 8.1

Untuk tulisan kali ini, saya akan memberikan informasi tentang bagaimana cara mengganti background dan warna pada Start Screen di Windows 8/8.1.

Langkah pertama, pilihlah gambar yang ingin dijadikan background di desktop anda, kemudian klik kanan pada mouse, pilih set as desktop background.
Langkah kedua, arahkan mouse anda pada pojok kanan atas atau bawah, nantinya akan muncul Charm, kemudian pilih Search. Masukkan kata “change” nantinya akan muncul beberapa pilihan hasil pencarian. Pilih “Change the background and colors on Start“.

Mengganti background dan warna pada Start Screen di Windows 8
Search “Change background and colors on Start

Langkah ketiga, setelah anda pilih, nantinya sistem akan memunculkan Personalize yang di dalamnya ada 20 pilihan mengganti desktop pada Start,Background color, dan Accent color.

Mengganti background dan warna pada Start Screen di Windows 8.1
                                                                Kostumisasi perubahan

Untuk mengganti background yang tadi sudah kita pilih di awal, pilih background di bagian pojok kanan bawah (saya lingkari), pilih warna background dan accent yang sesuai dengan selera. Anda akan melihat perubahan yang terjadi pada background, accent, warna di Start Screen anda.

Selamat mencoba dan semoga bermanfaat

Sunday, June 26, 2016

Turn off the lights with jQuery

For those who enjoy watching videos on the internet, this is a very useful script made with jQuery by Janko. And what this script does? It will turn off the lights for you, so that everything on the page will be fading to dark, except the video, and everything around the video will be less visible, in a way that nothing will distract you while watching it.

You can test it on the following demo blog - click the link that says "Turn off the lights" and the page will be darkened. To make the page elements active again, just click the "Turn on the lights" link:

Turn Off the Lights DEMO

How to add the "Turn off the Lights" Feature to Blogger/Blogspot 

How to Write SEO Optimized Blog Posts

I'm not a SEO Expert, nor what you will read further is a top secret, but this is about the basic optimization that everyone should apply in order to write seo optimized blog posts. And with these techniques, effort, and a bit of patience, you can occupy the best places in the search results of different search engines.

Obviously, not all scenarios are the same, neither all blogs are positioned in the same manner, some might have greater competition than others depending on how popular is the topic that they handle; therefore, when it comes to web ranking, there's no specific time that applies for all. Having said this, let's get into the subject.

Scriptaculous image slider/carousel for Blogger

Image galleries, sliders and slideshows have become increasingly popular within web pages and more and more developers have been creating these amazing powerful, versatile and sleek galleries. In this tutorial, you will see how to display the relevant content in an attractive and usable manner, by adding this beautiful carousel slideshow that will display a gallery of images with a cool sliding effect.
image slider for blogger

blogger widgets, blogger slider

If you need to see this carousel in action, please visit the demo blog.

Recent Rotating Post Gadget with Excerpt For Blogger

This JavaScript code will display the latest posts of any feed, the difference being that it has two parts which can be used individually or combined. The top of this widget will show a single post along with the title (link), author, date and a brief summary of its content. In addition, this post will rotate automatically within a list whose number of elements will be decided by us. At the bottom, we'll find a full list with the chosen posts that on mouse over will replace the post above, thus breaking the automatic cycle.

Before installing anything, let's see it in action to decide if it does what we want.

recent posts widget for blogger

How to Add a Tiny jQuery Circleslider to Blogger

Tiny Circleslider is a small jQuery plugin generating a circular carousel of images that we can slide infinitely (circular). When clicking on the red dot, the main picture moves to the left and another set of images will slide out. There is nothing complicated about using this type of carousel, however when it's about customizing it, we need to use a bit of arithmetic. All these details can be found in the author's homepage, so I'll just limit myself to show you the basics.

To see it in action, please visit the below demo blog and just drag the red dot:

Tiny jQuery Circleslider Demo

tiny jquery circleslider, image slider

How To Add Snow In The Background of Your Blog Using CSS

Today we’re going to go over a super simple CSS technique that you can use to make it snow on your Blogger blog. It seems particularly attractive since it doesn't require scripts, only CSS and three small images.

An advantage of this method is that by not using scripts doesn't overload the blog, the disadvantage is that users with not so modern browsers, will not be able to see it (in Internet Explorer works for version 10 and up).
The snow will fall in the background of the blog, which, in addition, prevent interfering with links or content (because the flakes are images), also prevent blocking the visibility of the content of the blog.

falling snow, snow, winter background, blogger

You can see the demo in this test blog.

Saturday, June 25, 2016

Filter out your visits to your blog from Google Analytics traffic statistics

The results of daily visits in the web hit counters always have a margin of error. In most of them, this margin is very high, therefore the statistics shown are not even a bit closer to the actual visits we have. Google Analytics has a very short margin of error, which makes it more reliable, so that we have a better idea of how many people visit us.

Thursday, June 23, 2016

Using JQuery + EasyDrag to Move Elements or Images by Clicking on Them

This is a simple and easy-to-use jQuery plugin which enables drag and drop functionality to make your site more interactive so that readers can "play" with certain elements on the page by dragging them from one side to another - for example, they can drag the images with a script to move them on any part of the blog just with a mouse click.


Drag and Drop Elements or Images on click with jQuery & EasyDrag

To see how this works, please visit the demo blog and click on any item, then move it anywhere on the screen:

How to Create a Sitemap or Table of Contents in Blogger

One of the limitations of a blog is that it doesn't have an index or sitemap of the site that could make it easier for readers to find content that they are searching for.
While the blog archive and labels have all the information about the published post, these do not appear on a single page completely, so searching for more posts is not always easy.

Luckily, this gadget will help you to add a table of contents or sitemap on Blogger showing the index of all posts separated by categories that have been published. It will also show the latest posts with a text saying New!

table of contents, sitemap, blogger

Demo: You can see it working by clicking here.

How to Create Magazine Style with Post Summaries and Thumbnails on Blogger

The magazine or newspaper style templates are those that display the posts summaries in the homepage by stacking the columns on top of each other. This kind of templates is very popular nowadays, and whether it is a news or technology blog, everyone needs a fresh magazine style layout for their blogs.

blogger tricks, blogger widgets, blogger templates
There are several ways to make posts appear this way. An option would be to use the Read more script to display a summary of the posts and add a conditional tag and a different style to the first post so that it will have a larger width than the older posts. So, this tutorial will show you how to create a magazine style for a Blogger Template. By following this tutorial, you can transform your boring and simple Blogger template to have an attractive and stylish magazine style layout.

To see how it looks like, please visit this demo blog.

Adding the Magazine/Newspaper style to a Blogger Template

Step 1. Before anything please make a backup of your current template to make sure that you won't lose anything important - just log in on your Blogger Dashboard and go to Template, then click on the Backup/Restore button. After you've got a copy of the xml template, click on the Edit HTML button:

blogger edit html template

Step 2. Click anywhere inside the code area and search by using CTRL + F keys for this line:
<data:post.body/>
Note: You'll find it more than once, but stop to the second one in order to see the changes.

How to create click events using CSS

An event is something that happens when we do something. In CSS, the most common is the hover selector which helps us to select elements when we mouse over them and then an event is executed automatically. There is one way to avoid this since in modern browsers there is a property called pointer-events which allows us to disable them. For instance, if we have a link and we set the pointer-events property value to none, it would simply not work:
<a href="page-url" style="pointer-events: none;">Click here</a>
Many use :target to make it work, however, this is not always the best choice if we consider its jumping behavior - click on the link below to see what happens:

Link with target
Lorem ipsum dolor sit amet, consectetur adipiscing elit. Nam eu cursus dui, ac fermentum eros. Interdum et malesuada fames ac ante ipsum primis in faucibus. Fusce elementum sapien et augue fringilla aliquam. Ut a viverra libero, eget commodo nisi. Maecenas ultrices facilisis dignissim.
<style>
#linktarget {display: none;}
#linktarget:target {display: block;}
</style>
<a href="#linktarget">Link with target</a>
<div id="linktarget">
Lorem ipsum dolor sit amet, consectetur adipiscing elit. Nam eu cursus dui, ac fermentum eros. Interdum et malesuada fames ac ante ipsum primis in faucibus. Fusce elementum sapien et augue fringilla aliquam. Ut a viverra libero, eget commodo nisi. Maecenas ultrices facilisis dignissim.
</div>
Another option is to use the :focus selector which will make the hidden content to expand on mouse click.
The advantage of this selector is that the page stays still, however, we have to click anywhere "outside" to close the expanded content and besides this, the hidden content should be immediately after, with no intermediate tags:

How to Add Adsense Ads In the Middle or Anywhere inside Blogger Posts

In a previous post we saw how and where we can place Adsense ads on our blog; however, these methods would only work when we place the ads on predetermined and fixed locations. For posts area, the most common places are below the title, at the beginning of the post or at the end of the post.
adsense placement

But what if we want to display an AdSense ad in the middle of a post?

We can manipulate the location of the ads to be displayed by adding a script inside the template and using a tag inside our post to where we want the AdSense ad to appear. Once added, we can place the ads anywhere, be it between paragraphs or in the middle of the content etc.

Manually inserting Adsense ads in the middle of posts in Blogger is pretty simple, just follow these steps below:

Before proceeding, it is recommended do backup your template (go to Template > click on the Backup/restore button)

Step 1. First thing we need to do is to "parse" the AdSense code, in other words, convert it to plain text. Then go to Template, click on the Edit HTML button, click anywhere inside the code area and look for this tag (CTRL + F):
<data:post.body/>
Note: you may find it several times, but we need to stop at the second one or if you can't see any changes, test the third one

Screenshot
Step 2. Replace the <data:post.body/> tag with this code:
<div expr:id='"adsmiddle1" + data:post.id'></div>
<b:if cond='data:blog.pageType == "item"'>
<b:if cond='data:blog.pageType != &quot;static_page&quot;'>
<div style="clear:both; margin:10px 0">
<!-- Add here the code of your ad -->
</div>
</b:if>
</b:if>
<div expr:id='"adsmiddle2" + data:post.id'>
<data:post.body/>
</div>
<script type="text/javascript">
var obj0=document.getElementById("adsmiddle1<data:post.id/>");
var obj1=document.getElementById("adsmiddle2<data:post.id/>");
var s=obj1.innerHTML;
var r=s.search(/\x3C!-- adsense --\x3E/igm);
if(r>0) {obj0.innerHTML=s.substr(0,r);obj1.innerHTML=s.substr(r+16);}
</script>
Step 3. Put the converted Adsense code to where you see the <!-- Add here the code of your ad --> annotation, then save the changes by clicking on the Save template button.

Note: For centering ads, add the center tag before and after the AdSense code, like this:
<div style="clear:both; margin:10px 0">
<center>
<!-- Add here the code of your ad -->
</center>
</div>
Step 4. When you create a New Post, add this tag inside the HTML section to where you want the Google AdSense ads to appear:
<!-- adsense -->
For example:
<div>This is a demo text. This is a demo text. This is a demo text. This is a demo text. This is a demo text. This is a demo text. This is a demo text. This is a demo text. This is a demo text. This is a demo text.</div>
<!-- adsense --><div>This is a demo text. This is a demo text. This is a demo text. This is a demo text. This is a demo text. This is a demo text. This is a demo text. This is a demo text. This is a demo text. This is a demo text.</div>

Screenshot
Note: If you don't add the label to bring up the ad, then the ad will appear below the title by default.

And you don't have to worry about violating the Google's Terms of Service because applying this method we are not changing the structure of the ad.

Popular Posts Widget for Christmas

The Christmas countdown has begun and while homes are decorated with colorful lights and the sweet smell of pine trees, there's no reason why we wouldn't decorate our Blogspot blog with Christmas bells next to the Popular Posts widget for Blogger!

So, today I was playing around a bit with CSS and I was thinking that it would be cool to add some fresh styles to the Popular Posts widget in such a way to look just ready for the forthcoming Christmas holiday.

popular posts widget, blogger gadgets

To see a demo of this Popular Posts widget for Christmas, please visit the demo blog:

Wednesday, June 22, 2016

How to Use Character Entities in CSS, HTML and JavaScript

Sometimes, when using scripts, we must write special characters like accents by using a special set of codes called character entities, however these don't always look good or we get a question mark or other strange symbols. Usually, this is solved if the character encoding is done right but the logic may not always work.

In Blogger, special characters most of the time appear correctly, but when it is about other services, like external files, things can get complicated.

Create a CSS Image Slider with Thumbnails for Blogger

Image galleries/sliders are particularly useful for photoblogs, but they could also serve those who occasionally need a gadget like this. As we have seen in a previous tutorial, on the top of the main thumbnail, we have had some smaller thumbnails which were enlarged at the bottom each time an image was selected. The difference is that we had to click the thumbnail in order to show a larger version which was acquired with JavaScript.

This time will use only hover and CSS. To see it in action, visit the demo blog:

Demo blog


How to Add A CSS Image Slider with Thumbnails to Blogger

How to add a thumbnail image/photo gallery in Blogger

For those who would like to show pictures in an image gallery, here's a beautiful gallery made with JavaScript and CSS. This image gallery displays the available thumbnails either vertically or horizontally on top of the selected picture, thus making it easier for you to pick different images on mouse click.

With the help of CSS, we can make the <img> element to display on same position with the rest of the thumbs and style the thumbnails as small blocks with a defined height/width. The script will add a click-event for each <li> object that changes it's child's <img> visibility and will assign an "active" class name to the <li>.

Related:
Image Slider with Mouse Hover Effect using only CSS
Possibly the Most Simple jQuery Slider
Spacegallery: A Time Machine-like Slideshow/Image Gallery

Demo blog

Add a Cool Style to Blogger Threaded/Nested Comments

If you need a fresh style to the threaded comments of a standard Blogger template, here's a simple CSS that will help you to apply a different background, make your avatars rounded, add a border with rounded corners and a triangle which is actually an HTML entity to get that speech bubble look on your comments.

You can see a demo here.

To have this style in your comments, all you need to do is to paste the below code inside the CSS part of the template, which is between <b:skin> and </b:skin>

Styling Simple Nested Comments with CSS


Create a CSS3 Image Hover Effect with Animated Vinyl Record

Here is an amazing CSS image effect to reveal more information on your images with a really cool CSS3 hover animation. This is just perfect for blogs dedicated to music or if you just want to show off the music that you love.

So, what we will do in this tutorial is to take an image for our album cover, add some fancy CSS3 transitions and transforms that, on hover, will slide out a pure-CSS vinyl record behind it. Finally, we will add some basic HTML to our post or page where we need to apply this amazing effect.

Demo: hover over the album cover and see how CSS reveals further information:


The Wall is the eleventh studio album by the English progressive rock group Pink Floyd.

How to Apply The Animated Vinyl Record on Blogger Images


How to Increase Thumbnail Resolution on Blogger

When we add a widget on Blogger, the thumbnails will keep a default size of 72 x 72px which might not look good if we try to make them bigger using only CSS. However, with a bit of JavaScript we'll be able to replace the thumbnail with the same image of higher resolution and this way, larger images will no longer appear blurry.

In this tutorial we will see how we can replace the default thumbnail size of the popular posts widget even though we can apply this trick on any of the blog widgets.

Demo Blog.

Changing the Thumbnail Size for the Popular Posts Widget

Step 1. First, let's add the Popular posts gadget by going to Layout > click on the Add a gadget link and select Popular Posts from the popup window.

adding popular posts gadget


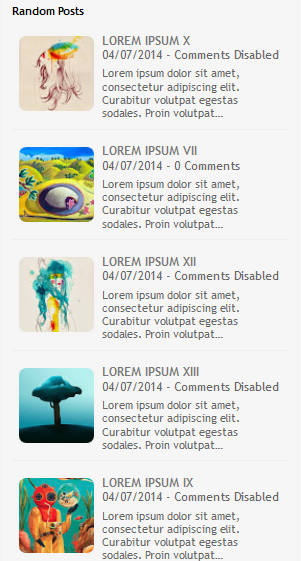
Advanced Random posts widget for Blogger with image thumbnails and snippets

When your blog has too many posts, visitors don't always have the time or desire to go through all the posts written there in order to make an idea of the blog's content. Thus, a random posts widget that will allow visitors to find content more easily could be really useful. This tutorial will show you how to add a random posts widget to display a list of posts in a random order with thumbnails and excerpts.

random posts widget for blogger

Demo


How To Add a Floating Sticky Footer Bar in Blogger

I have seen that many of those using toolbars such as Wibiya have had to remove it because of interfering with the performance of some scripts like Scriptaculous and Prototype, while others have chosen to remove these scripts just to continue using the toolbar.

Well, for those who prefer to have a custom toolbar that does not give them such problems and allow them to continue using other scripts, here's how to create our own floating toolbar with a close option. The toolbar contains a search box, link for feed subscription, link to follow on Twitter and Facebook, like button to share on Twitter or Facebook and translator in five languages.


You can see it working in this demo blog.

Adding a Custom Sticky Toolbar on Blogger

Step 1. Login to your Blogger account > select your blog > click on the Template option on the left side


Step 2. Click on the Edit HTMl button on the right side > click anywhere inside the code area and press CTRL + F keys to open the Blogger search box

How to customize or edit the linkwithin related post widget

LinkWithin is a very popular widget that shows the related posts with a thumbnail and although it is not a new gadget among bloggers, many avoid using it for its lack of customization. So, in this post we will see how to add LinkWithin on a Blogger blog and how to customize it.

This is what we will do with this gadget:

- Change the location of the gadget;
- Remove the LinkWithin link;
- Change the "You might also like" title with any other text;
- Add rounded borders to images;
- Remove the border that separates posts;
- Add a background color;
- Change the background color on mouse over;
- Change the post titles color and font

Adding the LinkWithin gadget to Blogger

First of all we need to install the LinkWithin gadget - for this, we have to go to the LinkWithin homepage and type in the required information:

linkwithin gadget, related posts widget, blogger widgets
Although it gives the option to choose Blogger as a platform, we will select Other so that we'll be able to put the code directly into our template and then modify it. Select the number of posts (stories) according to the width of posts - if the width of the posts container is small, then it is recommended to display fewer related posts.

By clicking on the "Get widget!" button, we'll be given the code that we need use it. It should look something like this:
<script>
var linkwithin_site_id = XXXXXXX;
</script>
<script src="http://www.linkwithin.com/widget.js"></script>
<a href="http://www.linkwithin.com/"><img src="http://www.linkwithin.com/pixel.png" alt="Related Posts Plugin for WordPress, Blogger..." style="border: 0" /></a>
That's the basic code we need to copy. Now login into your Blogger account > select your blog to where you want to add the LinkWithin gadget and go to Template > click on the Edit HTML button:


Cick anywhere inside the code area and press the CTRL + F keys to search for the following line:
<div class='post-footer'>
Just above this line, paste the LinkWithin code.

By doing so you already have the LinkWithin gadget on your blog and the result will be like this:

linkwithin gadget, related posts widget, blogger widgets
Note: If you would like to show only in the individual post, you can enclose the code using a conditional.

Collapsing Content for Blogger

Many times when we think about making a blog, we want to put many gadgets, although many are not necessary, or perhaps only a few of them. But to add the gadgets that we want, we need to have enough space. A solution would be using an expanding/collapsing menu that is hidden and expands when the user clicks on it.

Originally, this plugin called Sliding Login Panel was created so that users could register on the site, but as we know, in Blogger we don't have the option to add a user registration, however, that doesn't mean that we can't take advantage of this plugin and use it to add other elements, such as a menu, search box, social icons, feed subscription etc.
You can find a demo of this panel in this blog - just click on the Open menu link on the top.

Orbit - jQuery Image Slider Plugin For Blogger


In this tutorial, you will see how to add another beautiful image slider for Blogger / BlogSpot made with jQuery and, of course, with HTML and CSS. This slider, called Orbit, is a lightweight jQuery plugin that will display multiple images in a limited space using navigation arrows (previous-next buttons). On the upper left of the Orbit slideshow, we have some small bullet icons indicating the current image that we are viewing and, on the upper right side, is the pause option and a timer letting us know when the next image will be displayed.

If you want to see this cool image slider in action, please visit this demo blog:

Demo Blog

image slider, slideshow, jquery

Related:
Photo Gallery with Thumbnails using Javascript and CSS
Spacegallery: A jQuery Time Machine-like Slideshow/Image Gallery
Image Slider that Displays Pictures on Mouse Hover using only CSS

The HTML markup is pretty clean, just an element that wraps multiple images where the captions are generated from the span tags of these images.

Add A CSS Animated Share Button on Blogger

I saw this on Paulund, a highly recommended site with a good collection of snippets, i.e., a collection of different codes that develop small utilities, all of these being applicable to web design.

In this tutorial we will see how we can add as similar button with a really cool hover effect and four social media icons on Blogger with links to share the current page on Facebook, Twitter, Google+ and Pinterest. However, we can replace these social networks later with any other just by changing the links below.

Demo


Social Media Sharing Buttons below Blogger Post Title

Add floating social media sharing buttons below Blogger post titles

It is becoming increasingly important to make our posts appreciated and shared on social networks and one of the best ways to get traffic to our blog/website and boost sharing stats is to add social sharing buttons.

In this tutorial we will see how to add a floating social media sharing bar below the title of Blogger posts, so when a reader scrolls down the page, he will still be able to see the sharing buttons without having to scroll back to the top.
Adding the below jQuery script will make the buttons float in a fixed position as soon as they reach "the top" of the page. By scrolling back, the buttons will return to their initial position.

What is black hat seo?

The difference between white hat SEO and black hat SEO

The search engine optimization (SEO) is a good chance to promote your blog on Google search results and other search engines. For those who don't understand how SEO works, I've posted some articles on this blog that may help, but it's important to understand that there are good and bad techniques that could have a direct impact on your ranking. So, in this post I'll talk about the terms known to those who are familiar with SEO - the black and white hat - and we will get to know what's good and what is not when we think about optimizing our website and its content.

black hat and white hat, seo techniques

What is black hat seo?

From the 'SEO dictionary', the term black hat has to do with the abusive techniques that will force the search engines to look at a specific site and rank it. This might work at first, but the algorithms can already see some of these techniques that have become common for a fast result.

Such practices to trick the search engines are, for example, the excessive use of keywords, especially in headings and subheadings; transparent keywords to the user - the so-called hidden text, automatically generated content, pages redirecting automatically to other content and more.

What is white hat seo?

The white hat has to do with the good techniques in the 'eyes' of search engines. These are considered ethical techniques for the ranking, helping, thus, the positioning of a website or blog. However, working the white hat is a process that requires dedication and results may take longer to appear (this is why so many people opt for black hat in order to 'try' something more 'effective') but the results could be much more stable and satisfactory.

Tuesday, June 21, 2016

PageRank Checker - Check Your Google Page Rank

PageRank is an algorithm used by Google Search to rank websites in their search engine results. PageRank was named after Larry Page, one of the founders of Google. PageRank is a way of measuring the importance of website pages. According to Google:
"PageRank works by counting the number and quality of links to a page to determine a rough estimate of how important the website is. The underlying assumption is that more important websites are likely to receive more links from other websites."

Source: Wikipedia

Briefly, the PageRank is an assessment of the importance of a web page. This relevance is calculated and published on a scale from 0 to 10. Google basically takes into account the number of links that each page receives, however, it's no use getting any links, it is important that these links are from quality sites which are related to your links, preferably internal links. A greater importance has the quantity of internal links, linked by other websites, which happens when you create a post and someone publishes the link that redirects to this posting that you created. Therefore, the more links your blog or site has, the higher is the probability of having a good PageRank.
pagerank, check page rank

Now that you understand what PageRank is, how about checking yours?