Showing posts with label Blog Design. Show all posts

Tuesday, July 19, 2016

4 Different Styles For the Popular Posts Widget

Blogger allows us to easily add a "Popular Posts" widget, that we select from its list of gadgets, and we can do that by going to the "Layout" of our Blog.

This gadget, as the name implies, shows which are the most visited blog posts, and you can set it to display the info you want in four possible combinations: (1) only the title of the post, (2) a thumbnail of the image and the post title, (3) post title with a summary, and (4) post title with a thumbnail and a post snippet.

This is an element that you shouldn't miss in your blog because it encourages your visitors to navigate through your content and that can result in higher income if you're monetizing your blog because it would generate an increase in the number of pages visited, and in turn, can attract the users' interest to subscribe to the blog and to read interesting content.

Preliminary steps: Add the gadget, if you haven't done it yet.


1. Select the "Layout" tab and add the "Popular Posts" gadget in that part of your blog you want to appear, such as in your sidebar, by clicking on "Add a Gadget".

2. Configure the widget to show only the post titles. You can do this by clicking on the "image thumbnail" and "snippet" checkboxes, as shown in the following image.

3. After configuring the widget, save the changes by clicking on Save, and then Save arrangement.

Customizing Numbered Lists in Posts + 3 Examples

From the Compose tab of a Blogger post, we can create numbered lists using the "Numbered List" tool.

blogger gadgets, blogger widgets

A numbered list is achieved through the HTML code of a "ordered list". You don't have to worry about adding the HTML, because the editor does it for you by using this tool. If you go to the HTML tab, you'll see that the list you created appears something like this:
   <ol>
<li>The content of the 1st. element</li>
<li>The content of the 2nd. element</li>
<li>The content of the 3rd. element</li>
<li>The content of the 4th. element</li>
    etc...
  </ol>
This tool will automatically number each element of the list taking an "order", hence the name "ordered lists in HTML". In each element a number is successively generated (from 1 onwards), though you can not see this in the HTML code.

Customize the scroll bar (scrollbar) with JScrollPane

JScrollPane is a jQuery script that allows you to change the blog' scroll bar, ie the browser scrollbar.
Although we can use CSS to change it, the problem is that is not standardized, because with CSS we can make it work only in Chrome and Safari; and in the case of Internet Explorer it also has its own code but obviously it only works in that browser (I don't know which versions). So what we will do then is to give a new look to the scrollbar but by using jQuery, so the change will be visible in all browsers.

Demo

Friday, July 1, 2016

Page peel effect using jQuery

Page Peel is a popular page flip effect that when your cursor is passing over it, will show "what's behind" as if it would be a book. There are many ways to do this, many of them use flash files which makes it less customizable, however, the one that we will see in this post is made with jQuery.

Usually, the content that is "behind", is an image for subscribing to feed, but you can put any image and link to any page.

page peel, blogger gadgets
Demo

You can see an example in this demo blog.

Wednesday, June 29, 2016

Before/After Photo Effect with jQuery

If you have a design or makeup blog, or if you are using before and after image comparison, this script will surely be very useful for you. In this tutorial, you will see how to add the Before/After plugin, a script that works with jQuery to display two pictures dynamically for comparing them at the same time.

To see it in action, please click on the demo link from below - by dragging sideways the small bar, you'll see both images that are being compared:

Before & After Demo


Implementing this script is really easy. We just need jQuery, the Before/After script, and the two images to compare.

Spacegallery: image gallery/slideshow made with jQuery

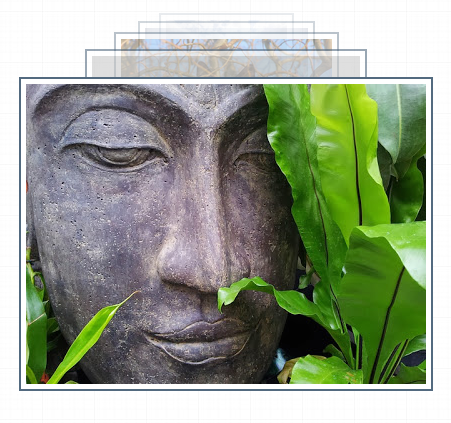
There are many types of galleries for images that can be found on the internet, but we rarely find one displaying images so differently like this one. Those using Mac OS X will surely notice a lot of similarity with Time Machine and those who don't, I'm sure will enjoy this type of effect for viewing images.

image gallery with jQuery for blogger
SpaceGallery is a JQuery based slideshow / image gallery that performs overlaying in a visually appealing manner and provides a smooth fade out effect to images. This 3D image gallery lets you float through your pictures easily by enlarging them with an Apple-like animation.

To see the SpaceGallery slideshow in action, please visit this demo blog and click on the first image:

Add Keyboard Keys Effect To Your Text in Blogger with CSS

For many of us the design and the template are the most important, making our readers be more interested and coming back to our blog. There's an HTML element meant for marking up keyboard keys named <kbd> which can be styled with CSS, so why not use it to make those elements look the keyboard keys?

Thus, in this tutorial, I am going to show you how to create a keyboard keys effect with CSS. It doesn't require images so your blog will load faster.

how to add keyboard keys with css in blogger

How to Add Keyboard Keys to Blogger


Sunday, June 26, 2016

Scriptaculous image slider/carousel for Blogger

Image galleries, sliders and slideshows have become increasingly popular within web pages and more and more developers have been creating these amazing powerful, versatile and sleek galleries. In this tutorial, you will see how to display the relevant content in an attractive and usable manner, by adding this beautiful carousel slideshow that will display a gallery of images with a cool sliding effect.
image slider for blogger

blogger widgets, blogger slider

If you need to see this carousel in action, please visit the demo blog.

How to Add a Tiny jQuery Circleslider to Blogger

Tiny Circleslider is a small jQuery plugin generating a circular carousel of images that we can slide infinitely (circular). When clicking on the red dot, the main picture moves to the left and another set of images will slide out. There is nothing complicated about using this type of carousel, however when it's about customizing it, we need to use a bit of arithmetic. All these details can be found in the author's homepage, so I'll just limit myself to show you the basics.

To see it in action, please visit the below demo blog and just drag the red dot:

Tiny jQuery Circleslider Demo

tiny jquery circleslider, image slider

How To Add Snow In The Background of Your Blog Using CSS

Today we’re going to go over a super simple CSS technique that you can use to make it snow on your Blogger blog. It seems particularly attractive since it doesn't require scripts, only CSS and three small images.

An advantage of this method is that by not using scripts doesn't overload the blog, the disadvantage is that users with not so modern browsers, will not be able to see it (in Internet Explorer works for version 10 and up).
The snow will fall in the background of the blog, which, in addition, prevent interfering with links or content (because the flakes are images), also prevent blocking the visibility of the content of the blog.

falling snow, snow, winter background, blogger

You can see the demo in this test blog.

Thursday, June 23, 2016

Using JQuery + EasyDrag to Move Elements or Images by Clicking on Them

This is a simple and easy-to-use jQuery plugin which enables drag and drop functionality to make your site more interactive so that readers can "play" with certain elements on the page by dragging them from one side to another - for example, they can drag the images with a script to move them on any part of the blog just with a mouse click.


Drag and Drop Elements or Images on click with jQuery & EasyDrag

To see how this works, please visit the demo blog and click on any item, then move it anywhere on the screen:

Wednesday, June 22, 2016

Create a CSS Image Slider with Thumbnails for Blogger

Image galleries/sliders are particularly useful for photoblogs, but they could also serve those who occasionally need a gadget like this. As we have seen in a previous tutorial, on the top of the main thumbnail, we have had some smaller thumbnails which were enlarged at the bottom each time an image was selected. The difference is that we had to click the thumbnail in order to show a larger version which was acquired with JavaScript.

This time will use only hover and CSS. To see it in action, visit the demo blog:

Demo blog


How to Add A CSS Image Slider with Thumbnails to Blogger

How to add a thumbnail image/photo gallery in Blogger

For those who would like to show pictures in an image gallery, here's a beautiful gallery made with JavaScript and CSS. This image gallery displays the available thumbnails either vertically or horizontally on top of the selected picture, thus making it easier for you to pick different images on mouse click.

With the help of CSS, we can make the <img> element to display on same position with the rest of the thumbs and style the thumbnails as small blocks with a defined height/width. The script will add a click-event for each <li> object that changes it's child's <img> visibility and will assign an "active" class name to the <li>.

Related:
Image Slider with Mouse Hover Effect using only CSS
Possibly the Most Simple jQuery Slider
Spacegallery: A Time Machine-like Slideshow/Image Gallery

Demo blog

Add a Cool Style to Blogger Threaded/Nested Comments

If you need a fresh style to the threaded comments of a standard Blogger template, here's a simple CSS that will help you to apply a different background, make your avatars rounded, add a border with rounded corners and a triangle which is actually an HTML entity to get that speech bubble look on your comments.

You can see a demo here.

To have this style in your comments, all you need to do is to paste the below code inside the CSS part of the template, which is between <b:skin> and </b:skin>

Styling Simple Nested Comments with CSS


Create a CSS3 Image Hover Effect with Animated Vinyl Record

Here is an amazing CSS image effect to reveal more information on your images with a really cool CSS3 hover animation. This is just perfect for blogs dedicated to music or if you just want to show off the music that you love.

So, what we will do in this tutorial is to take an image for our album cover, add some fancy CSS3 transitions and transforms that, on hover, will slide out a pure-CSS vinyl record behind it. Finally, we will add some basic HTML to our post or page where we need to apply this amazing effect.

Demo: hover over the album cover and see how CSS reveals further information:


The Wall is the eleventh studio album by the English progressive rock group Pink Floyd.

How to Apply The Animated Vinyl Record on Blogger Images


How to Increase Thumbnail Resolution on Blogger

When we add a widget on Blogger, the thumbnails will keep a default size of 72 x 72px which might not look good if we try to make them bigger using only CSS. However, with a bit of JavaScript we'll be able to replace the thumbnail with the same image of higher resolution and this way, larger images will no longer appear blurry.

In this tutorial we will see how we can replace the default thumbnail size of the popular posts widget even though we can apply this trick on any of the blog widgets.

Demo Blog.

Changing the Thumbnail Size for the Popular Posts Widget

Step 1. First, let's add the Popular posts gadget by going to Layout > click on the Add a gadget link and select Popular Posts from the popup window.

adding popular posts gadget


Orbit - jQuery Image Slider Plugin For Blogger


In this tutorial, you will see how to add another beautiful image slider for Blogger / BlogSpot made with jQuery and, of course, with HTML and CSS. This slider, called Orbit, is a lightweight jQuery plugin that will display multiple images in a limited space using navigation arrows (previous-next buttons). On the upper left of the Orbit slideshow, we have some small bullet icons indicating the current image that we are viewing and, on the upper right side, is the pause option and a timer letting us know when the next image will be displayed.

If you want to see this cool image slider in action, please visit this demo blog:

Demo Blog

image slider, slideshow, jquery

Related:
Photo Gallery with Thumbnails using Javascript and CSS
Spacegallery: A jQuery Time Machine-like Slideshow/Image Gallery
Image Slider that Displays Pictures on Mouse Hover using only CSS

The HTML markup is pretty clean, just an element that wraps multiple images where the captions are generated from the span tags of these images.

Add A CSS Animated Share Button on Blogger

I saw this on Paulund, a highly recommended site with a good collection of snippets, i.e., a collection of different codes that develop small utilities, all of these being applicable to web design.

In this tutorial we will see how we can add as similar button with a really cool hover effect and four social media icons on Blogger with links to share the current page on Facebook, Twitter, Google+ and Pinterest. However, we can replace these social networks later with any other just by changing the links below.

Demo


Tuesday, June 21, 2016

Add Author's Profile Picture and Name in Multi Author Blog

In this tutorial we will see how to add the author's profile picture and name on a Blogger blog just below the post title. This can make your blog not only look more personal but attaching an image to your blog posts in Blogger can help visitors identify, and perhaps gain a level of trust with you. Also, this could be a great addition to blogs with multiple authors, since the info for each of the publisher will be shown below the titles of their respective posts and this way, they will get the proper credit for their work.
multi-author blog, blogger tricks

Related: How to Add or Invite Multiple Authors on Blogger

How to add custom Variable definitions to Blogger

In this post we are going learn about the CSS Variable Definitions for Colors and Fonts that could be found at the top of the style sheet of a Blogger blog. The values for the Variable definitions can be modified directly through the Blogger Template Designer where are the settings for colors, backgrounds, fonts and font sizes.
blogger variable definitions

Most default Blogger templates, such as the Minima Template, use these settings for the CSS, which makes it easier to modify these variables through the Blogger dashboard, using the "Template Designer" (Template > Customize) editor and accessing to the "Advanced" section.

blogger template designer, variable definitions

If the definitions are already established in the CSS, we'll be able to change the background colors, font colors, styles or sizes, directly from our Blogger dashboard without having to touch the HTML code of our template.