Showing posts with label posts. Show all posts

Tuesday, July 19, 2016

4 Different Styles For the Popular Posts Widget

Blogger allows us to easily add a "Popular Posts" widget, that we select from its list of gadgets, and we can do that by going to the "Layout" of our Blog.

This gadget, as the name implies, shows which are the most visited blog posts, and you can set it to display the info you want in four possible combinations: (1) only the title of the post, (2) a thumbnail of the image and the post title, (3) post title with a summary, and (4) post title with a thumbnail and a post snippet.

This is an element that you shouldn't miss in your blog because it encourages your visitors to navigate through your content and that can result in higher income if you're monetizing your blog because it would generate an increase in the number of pages visited, and in turn, can attract the users' interest to subscribe to the blog and to read interesting content.

Preliminary steps: Add the gadget, if you haven't done it yet.


1. Select the "Layout" tab and add the "Popular Posts" gadget in that part of your blog you want to appear, such as in your sidebar, by clicking on "Add a Gadget".

2. Configure the widget to show only the post titles. You can do this by clicking on the "image thumbnail" and "snippet" checkboxes, as shown in the following image.

3. After configuring the widget, save the changes by clicking on Save, and then Save arrangement.

Sunday, June 26, 2016

Recent Rotating Post Gadget with Excerpt For Blogger

This JavaScript code will display the latest posts of any feed, the difference being that it has two parts which can be used individually or combined. The top of this widget will show a single post along with the title (link), author, date and a brief summary of its content. In addition, this post will rotate automatically within a list whose number of elements will be decided by us. At the bottom, we'll find a full list with the chosen posts that on mouse over will replace the post above, thus breaking the automatic cycle.

Before installing anything, let's see it in action to decide if it does what we want.

recent posts widget for blogger

Thursday, June 23, 2016

How to Create a Sitemap or Table of Contents in Blogger

One of the limitations of a blog is that it doesn't have an index or sitemap of the site that could make it easier for readers to find content that they are searching for.
While the blog archive and labels have all the information about the published post, these do not appear on a single page completely, so searching for more posts is not always easy.

Luckily, this gadget will help you to add a table of contents or sitemap on Blogger showing the index of all posts separated by categories that have been published. It will also show the latest posts with a text saying New!

table of contents, sitemap, blogger

Demo: You can see it working by clicking here.

How to Create Magazine Style with Post Summaries and Thumbnails on Blogger

The magazine or newspaper style templates are those that display the posts summaries in the homepage by stacking the columns on top of each other. This kind of templates is very popular nowadays, and whether it is a news or technology blog, everyone needs a fresh magazine style layout for their blogs.

blogger tricks, blogger widgets, blogger templates
There are several ways to make posts appear this way. An option would be to use the Read more script to display a summary of the posts and add a conditional tag and a different style to the first post so that it will have a larger width than the older posts. So, this tutorial will show you how to create a magazine style for a Blogger Template. By following this tutorial, you can transform your boring and simple Blogger template to have an attractive and stylish magazine style layout.

To see how it looks like, please visit this demo blog.

Adding the Magazine/Newspaper style to a Blogger Template

Step 1. Before anything please make a backup of your current template to make sure that you won't lose anything important - just log in on your Blogger Dashboard and go to Template, then click on the Backup/Restore button. After you've got a copy of the xml template, click on the Edit HTML button:

blogger edit html template

Step 2. Click anywhere inside the code area and search by using CTRL + F keys for this line:
<data:post.body/>
Note: You'll find it more than once, but stop to the second one in order to see the changes.

Wednesday, June 22, 2016

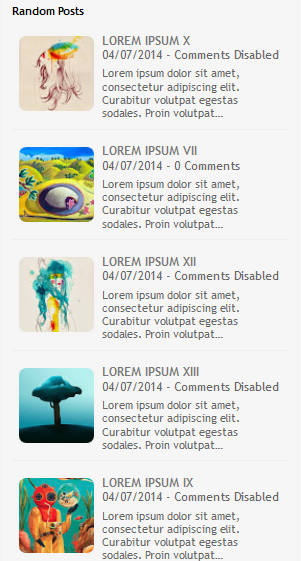
Advanced Random posts widget for Blogger with image thumbnails and snippets

When your blog has too many posts, visitors don't always have the time or desire to go through all the posts written there in order to make an idea of the blog's content. Thus, a random posts widget that will allow visitors to find content more easily could be really useful. This tutorial will show you how to add a random posts widget to display a list of posts in a random order with thumbnails and excerpts.

random posts widget for blogger

Demo


Monday, June 20, 2016

Responsive CSS Timeline with 3D Effect for Blogger

Here's another amazing way to display our Blogger posts. By applying the following Responsive CSS Timeline View with 3D Effect on Blogger Posts, we will have a responsive timeline-like structure of the most recent posts and their thumbnails, along with some cool CSS effects. When clicking on the associated radio input, the posts snippet/summary will expand by changing their style and size and will rotate in 3D. The main structure of this CSS timeline with 3D effect is an unordered list.

To get an idea of what it looks like, you can visit this demo blog.

responsive CSS timeline, customize blogger posts

How to Add Responsive CSS Timeline View to Blogger Posts

Step 1. Go to Blogger dashboard > Template > click on the Edit HTML button:

blogger template, edit html

Step 2. Click anywhere inside the code area and press the CTRL + F keys to open the search box:

Thursday, June 16, 2016

How To Set Custom Redirects in Blogger

Over time, most blogs may go through many changes, like posts being added or deleted. In some occasions, you don't want people to get 404 messages when they surf to posts or pages that don't exist on your blog and instead, make all requests to a specific link to be redirected to another page. One of the best way to avoid broken links and keep your traffic flowing in the right direction is setting custom redirects via the Blogger Custom Redirects tool.

In this post, we will see how to set custom redirects for Blogger posts and redirect an old URL to a new URL. But before redirecting any URL, you must know that there are two types of redirects:

A 302 redirect means that the page has moved temporarily. This redirect doesn't pass the URL value to the new location and instead, it will take the visitors to an appropriate location so that you aren't showing them a 404 page not found, or an error page. You can use a 302 redirect for coming soon pages or maintenance pages.

A 301 redirect means that a page has moved permanently to a new location. Use the 301 redirect when you deleted or changed the URL of your post. In most instances, the 301 redirects are always recommended for SEO because they will pass link juice (ranking power) to the redirected page and visitors will also benefit from this. However, 301s aren't suitable when you change your custom-domain, because it only supports redirection within the same blog, not to an external URL.

Now that we've established which is which, let's see how to set custom redirects for Blogger posts.

Sunday, May 29, 2016

Automatic Featured Posts Slider Widget for Blogger

Anyone with a blog wants readers to stay rather than move on to another. It's not being selfish but after someone has read one post, you'd definitely want them to read another, right? After all, isn't it one of the tenets of SEO to make people stay longer on your blog if it has to have a fighting chance at the rankings game?

The question now is: how exactly do you entice them to read a few more of your blog posts?

First off, you don't know exactly what brought a reader to your site. Well, you sort of do, if you have Google Analytics and all that. But that's beside the point. It wouldn't be productive for you to stare at GA the entire day hoping that it will tell you that yes, someone has been perusing your blog.

The point being driven at here is that you have to offer more on your blog. It's not enough that you get traffic from search engines and other sites; you also have to add some extras that will entice visitors to stay longer.

How exactly do you do that?

Wednesday, March 11, 2015

Building a List/Grid View Switcher in Blogger with Auto Read More

A list of posts in grid or list view provides a more defined canvas with which a blogger or website owner can use as a guide in creating content. This concept has extended to visitors, where they can have control on whether or not they wish to view posts in list or grid view. While custom modification codes are shared by some blogging sites, others are not. Some that are shared, however, can be complex even to bloggers themselves, such as JQuery.

The good news is there are lightweight codes available, including the Auto Read More in Blogger. Through it, a blogger can add two buttons that will enable visitors to switch between grid view and list view, depending on what they prefer. These buttons, however, are only visible on limited pages - homepage, label page and archive page. Nonetheless, it is better than not having this particular feature at all.

Unlike JQuery, the Auto Read More uses HTML, CSS and JavaScript. To view posts in a list view, two sets of CSS codes are added as one. Another set is added to view posts in grid view. Other combination of codes is used to enable easy switch between views, particularly at a click of a button.

How to Add a List/Grid View Switcher in Blogger

Thursday, March 5, 2015

Add Masonry, Grid Layouts to Blogger Posts with CSS and Javascript

How a website's content is displayed can spell the difference between being popular and obscure. Anything that looks chaotic or hardly readable is never going to be anyone's favorite. This is why content must be displayed in an organized, easy to follow and straightforward manner. Nothing works better than a structured grid, in this case.

Posts listed in grid view provide an excellent viewing experience for both the blogger or website owner and the visitors. This is especially true if the grid comes with images that would play with a person's visual inclination. What is great about grids is the seamless and smooth layout, complemented with a structured yet simple architecture. This makes it easier to navigate through a blog archive or product page. The style also enables a website owner to present posts in a more artistic and informative manner, without delving into the details. Suffice to say that a grid view demands creativity to be effortlessly mixed with functionality.

How views can be switched depends on a number of changes in a blog's codes. Some are fairly easy to implement, while others can be a little complex. Not to worry, as there are guides that will be provided. Grid styles also come in huge varieties, with each one designed to cater to a specific audience. Now, are you ready to go on the grid?